Introduction
Hello everyone, in this article, I will talk about the use of Karate. And no it’s NOT THE Karate. 😅
First, let’s briefly introduce Karate. Karate is an open-source test tool created by Peter Thomas in 2017. With Karate, it is possible to perform manual testing, automation testing, and performance testing.
We can list its basic features as follows:
You do not need to know any programming language to use the Karate tool. Tests are created using the Gherkin language with BDD syntax. Writing and reading tests is easy. JSON, XML, and HTTP formats can be used. It is possible to access different test environments from the same script.
CREATING A PROJECT
Now let’s create our first project with Karate. First, we open our IntelliJ application. We click on the new project button.
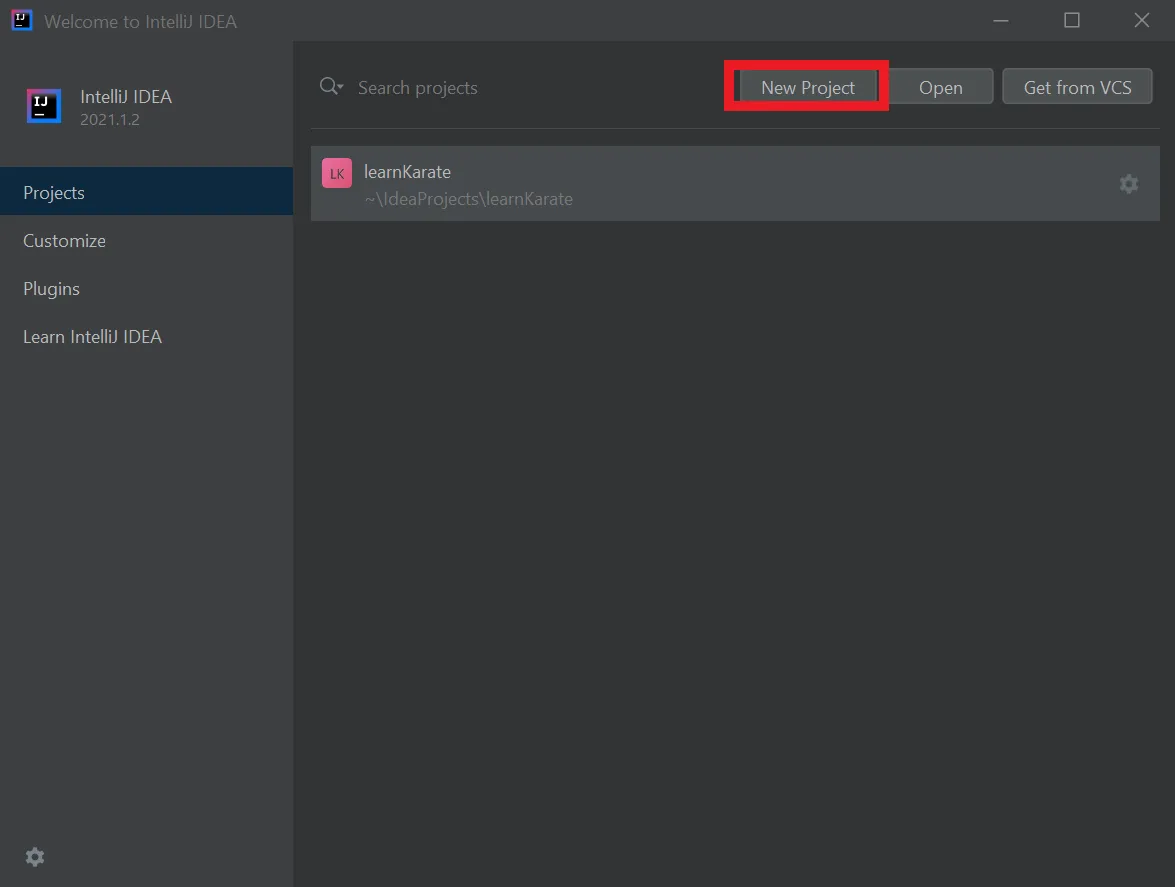
Afterwards, the following screen will appear. Here we need to select the ‘Create from archetype’ option.
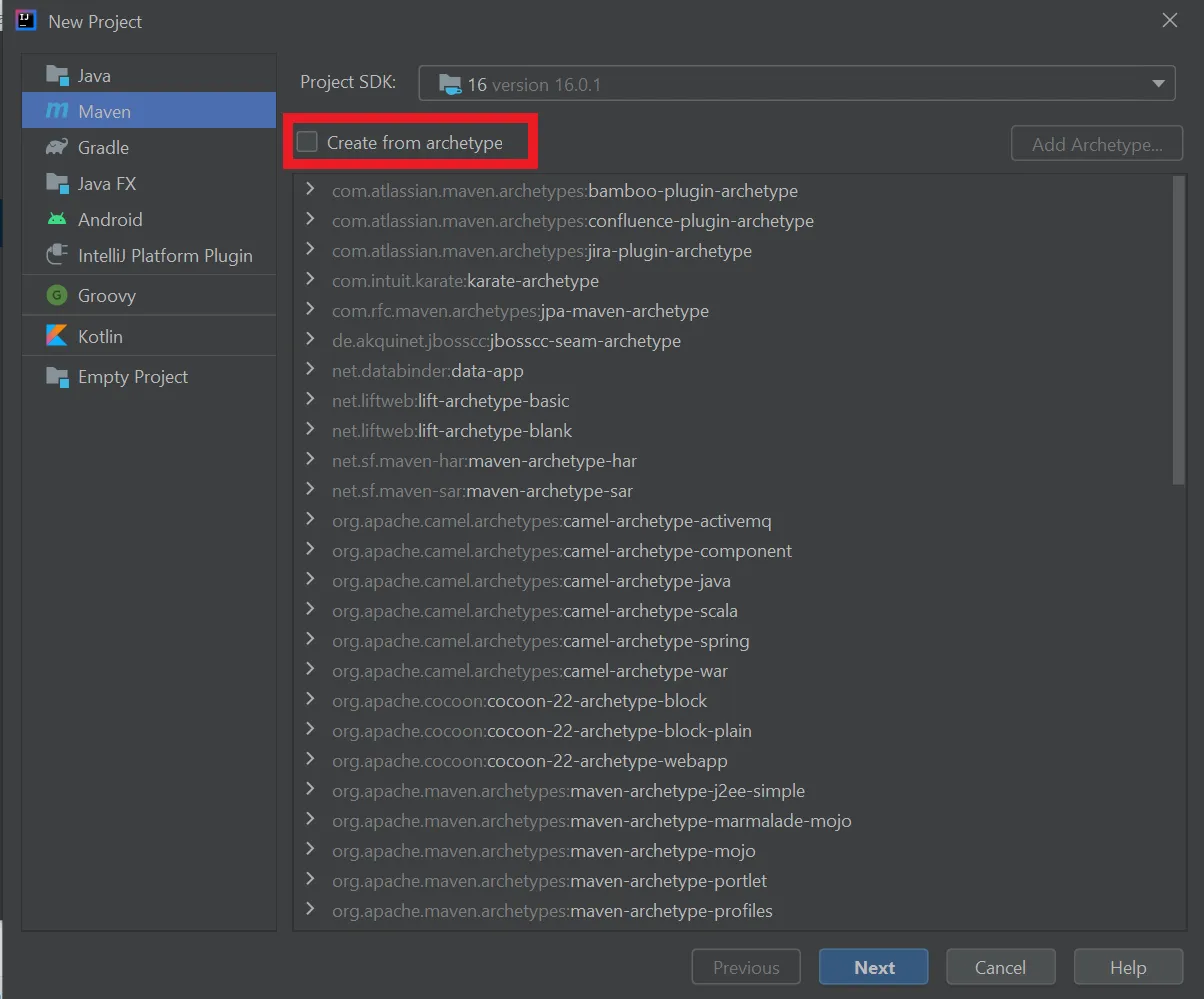
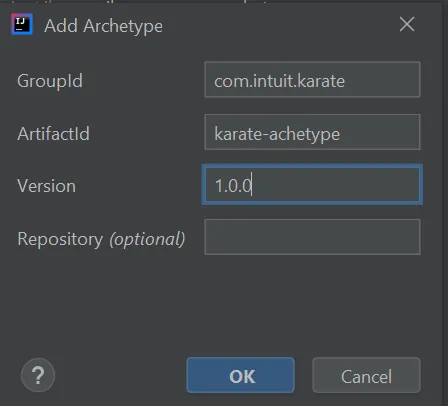
After selecting this option, the ‘Add Archetype’ button will become active. We click this button and fill in the necessary fields as shown below.
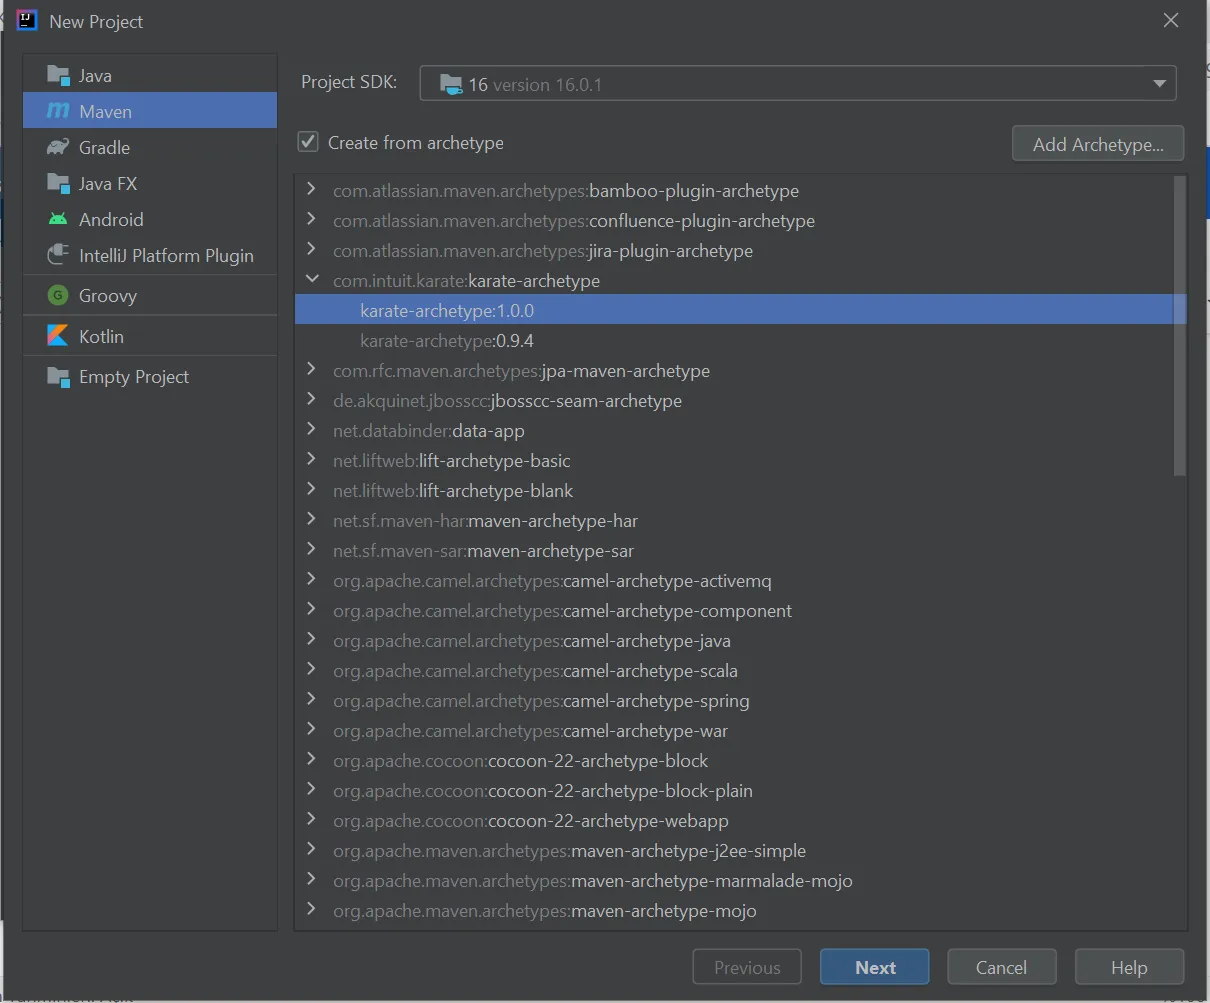
As we proceed, the previous screen will appear again, and the archetype we created will be visible in the list. We select the archetype and move on to the next step.
Next, we need to name our project. I chose to name it firstProject. You can name it as you wish and continue.
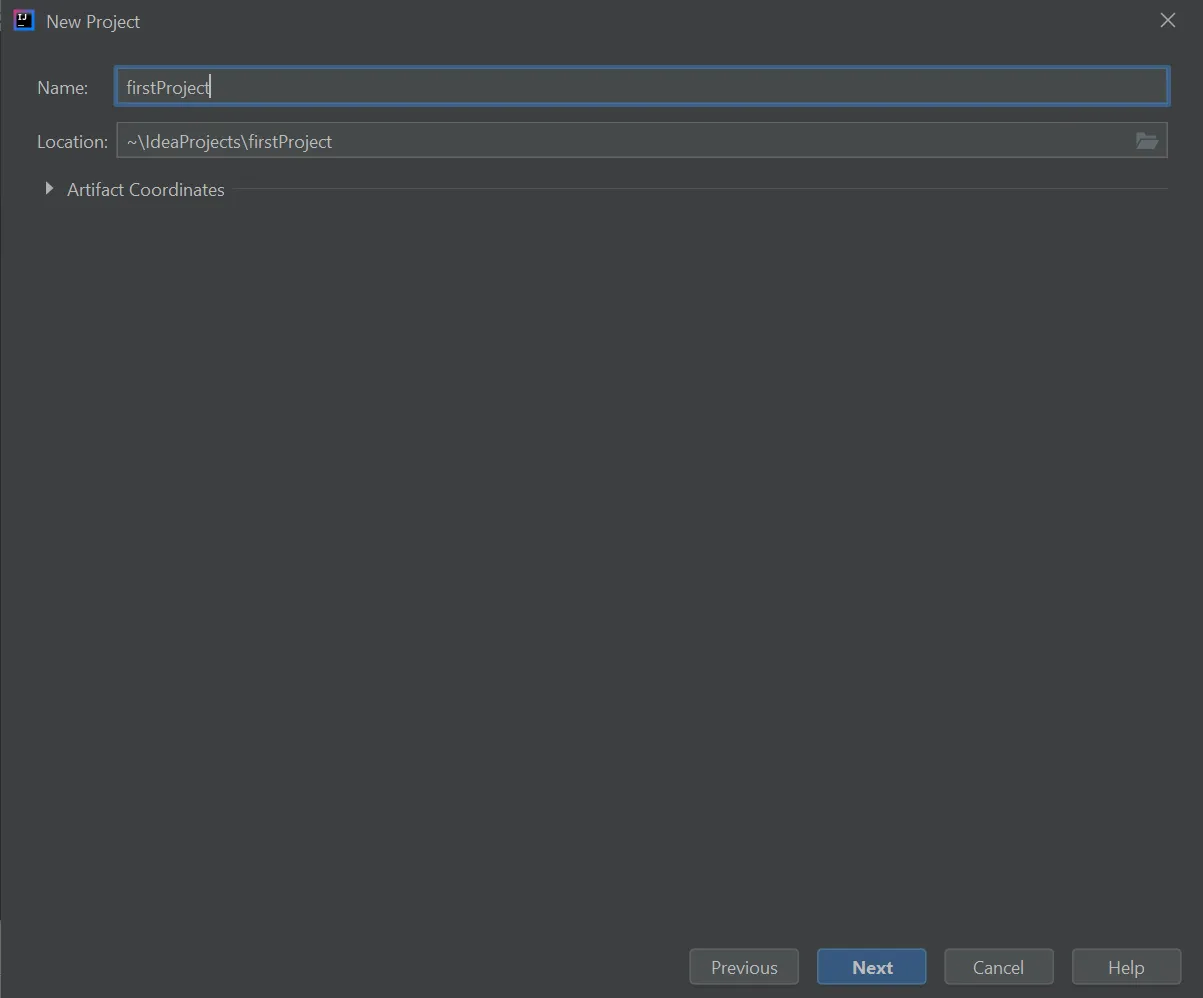
In the next step, you can proceed by selecting as shown below without making any changes.

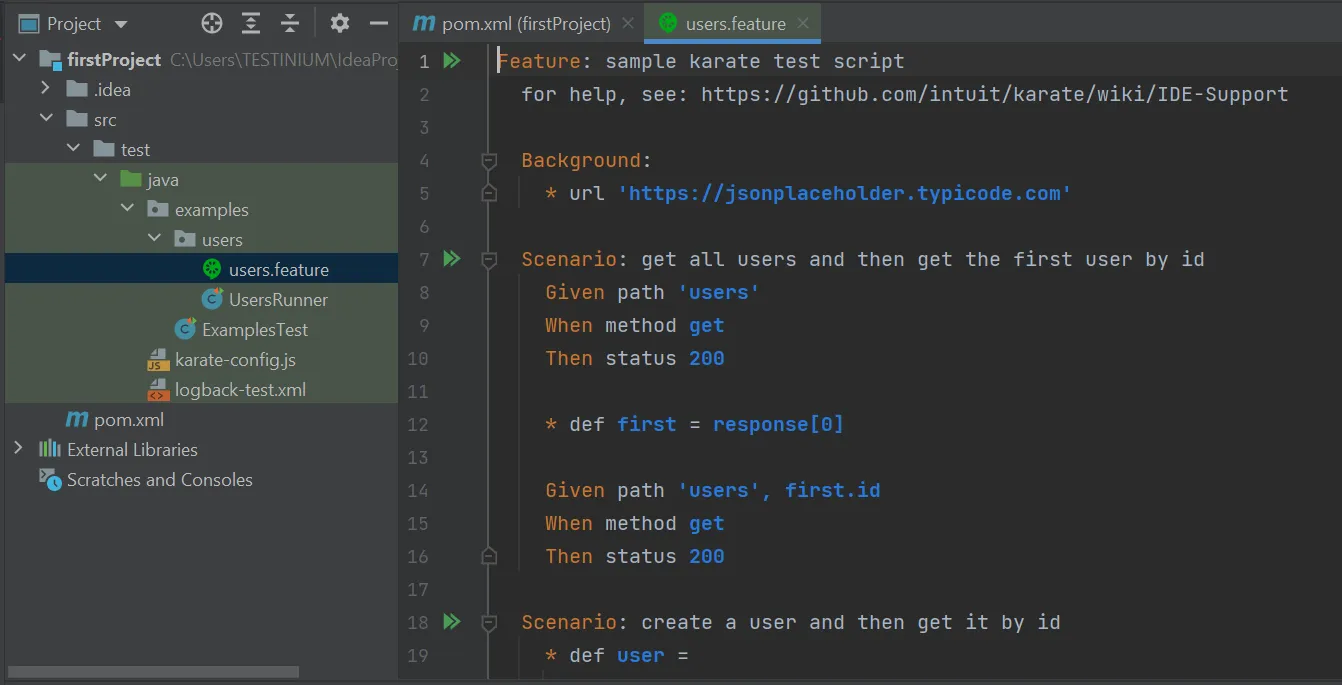
When we click the finish button, our project will appear as shown below.
After the project is created, we can see logs indicating that the Maven libraries have been installed in the terminal. At this step, it should say BUILD SUCCESS as shown below. Otherwise, not all libraries would have been installed, and we would encounter errors in our project.
Here, we also have a sample feature file that we can see as an example.

We can see the sample scenarios inside this file.
CREATING A TEST
Yes, we have created our first project. Now we can start writing our tests in our feature file. For this, we can create a new test folder or continue with the existing one. I will continue with the existing folder. Let’s right-click on the Java folder. Select New->Package.
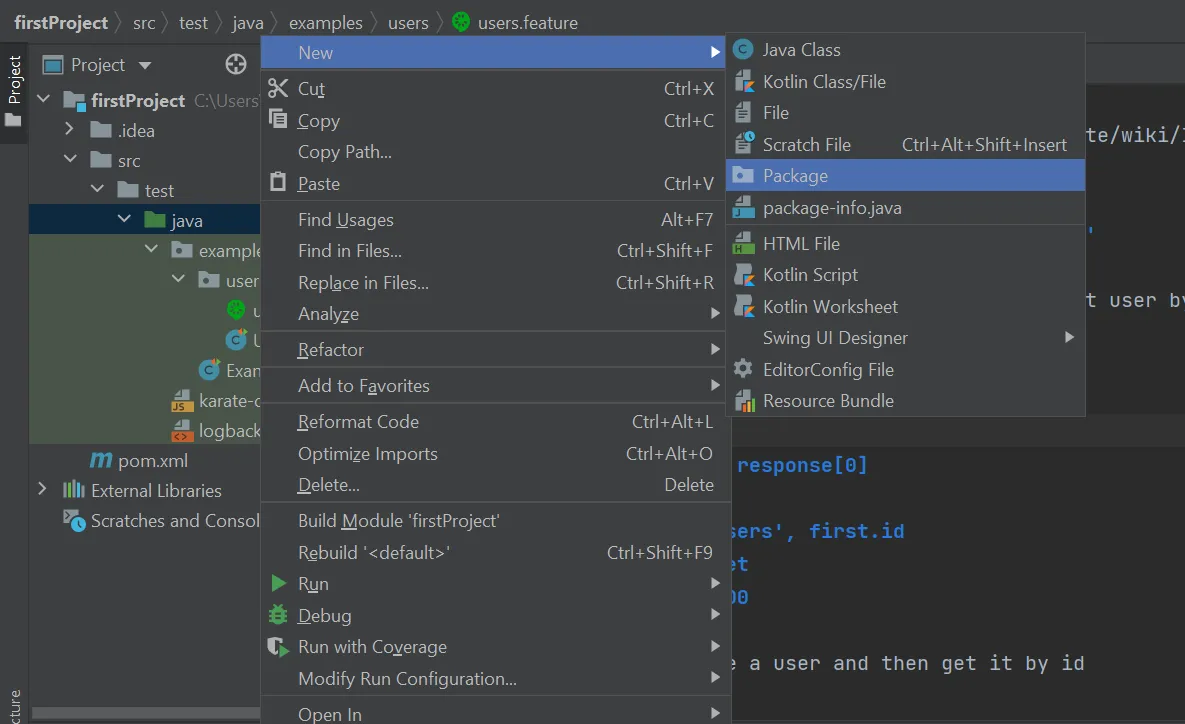
Right-click on the new folder we created and select New->File.
In the Gherkin language, test files are named as feature. Therefore, we should name our test file with the ‘.feature’ extension.
After defining our test file, a blank page will appear.
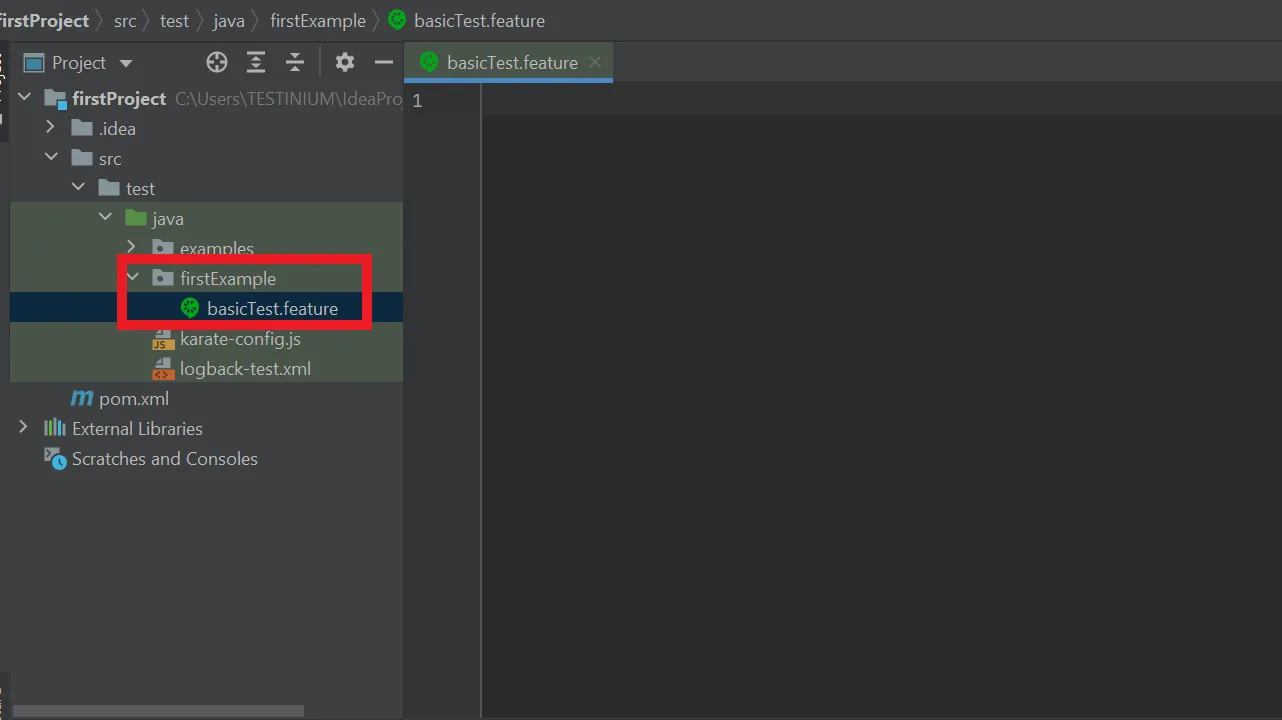
The features of the scenarios we will test should be defined in the feature file. I preferred to define the feature in the same way as the file name (basicTest.feature), but it can also be defined differently according to the scenarios.
Next, let’s name our test scenario.

After naming our scenario, we can move on to our steps. But first, let’s talk about some keywords used in the test steps and how they are used.
Given: The step where the necessary condition to start our scenario is specified. When: The step where the action to be taken is specified. Then: The step where the event that will happen after the action is taken is defined. And: The keyword used when there is more than one step.
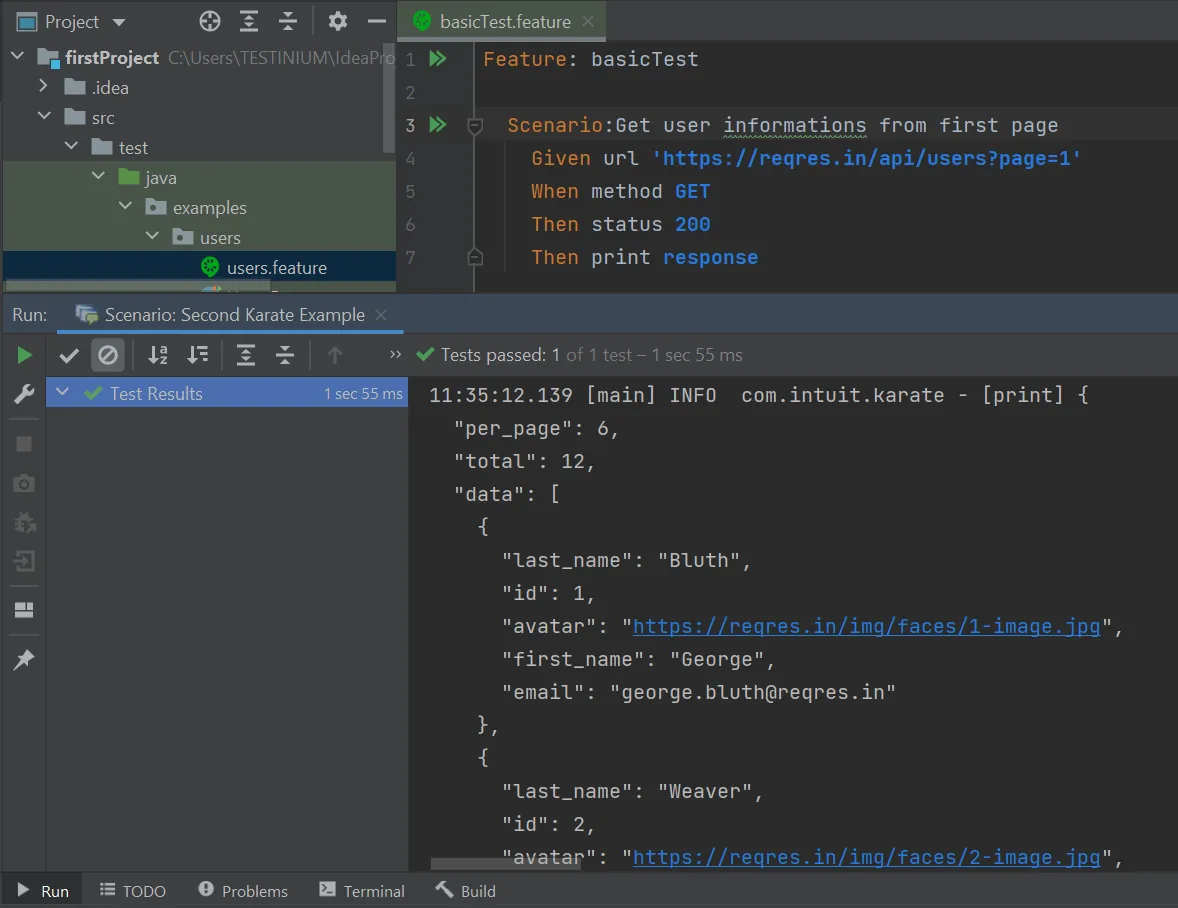
As shown below, we created our first scenario. We specified the address we want to go to, the method we will use, the status response we want to see, and then added the step to print our response.

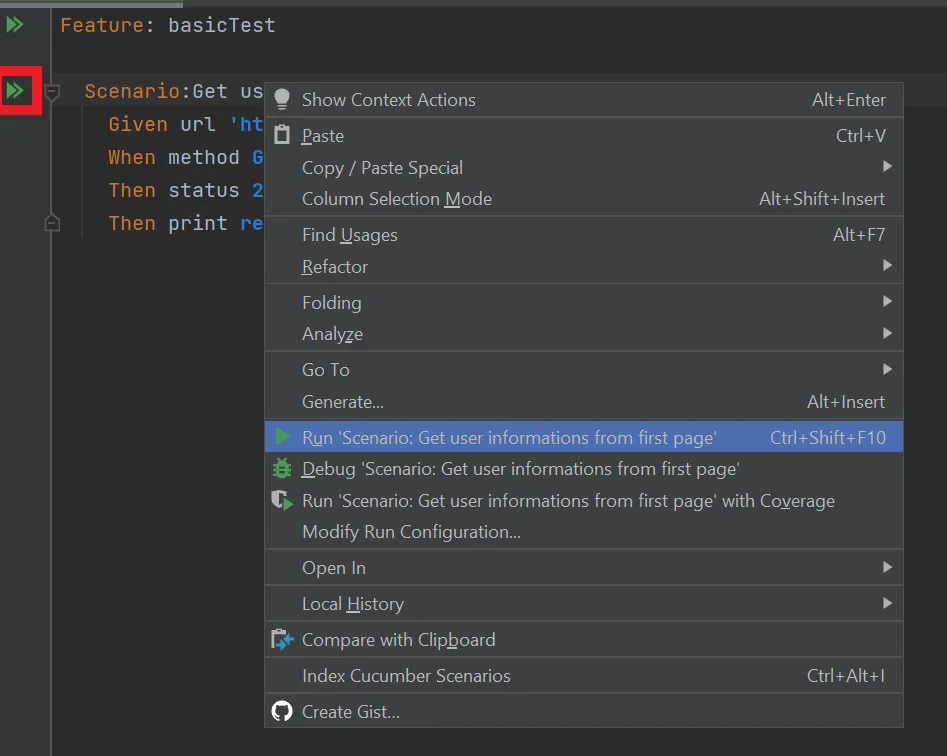
To run the test, we can right-click on the scenario and select run, or we can click the green arrow on the left to run the test.
After running the test, the response can be viewed as shown below.
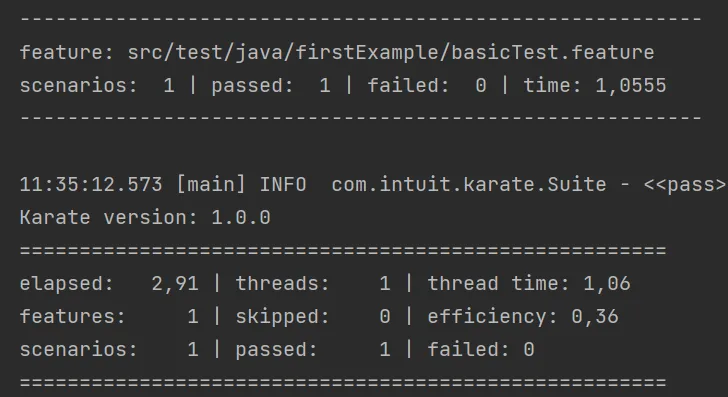
All test results will be displayed under the printed response as shown below.
In this way, we briefly talked about Karate and its usage. I hope this article will be useful to the readers.
SOURCES
